I’m pleased to announce that earlier today we updated our account menu to improve its clarity and make it easier for you to monitor communication with your writing team and get updates on your projects.
When you login you’ll notice that the menu is now a series of icons, instead of text links. The image above identifies the different menu items. Here are the the different items listed from left to right:
1. Messages
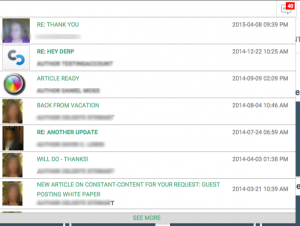
This update brings your messages to the forefront of your account by placing the messages in your account’s main menu. Clicking on this icon will reveal up to 50 of your most recent messages from writers on your team. If there are new messages you haven’t yet read, a red flag will appear so you know to review your messages.
Clicking on an individual message will load your message thread with the writer who sent it.
If you click the See More link at the bottom of the Messages menu, you’ll be taken to the main Messages page where you can also review your sent messages.
2. Notifications
Next to the Messages button is the Notifications button. Clicking this will show you the most recent notifications for your content projects. You can click on any of these notifications to be taken to the page on the site that the notification deals with. For example, if you click on a notification that a writer has claimed your request, you can click on the request name to see the request, or the writer’s name to see their bio.
Similar to the Messages menu, a red flag will appear over the Notifications button when you have new notifications to review.
If you click the See More button at the bottom of the Notifications menu you’ll be taken to the main Notifications page for your account. Here you can see a complete history of your notifications, as well as update your notifications by clicking the gear icon in the top right of the page. These are the types of notifications you can chose to receive (or not):
- Request Approved
- Request Expiring
- Request is Claimed
- Request is Unclaimed
- New Article for Request
- Project Events
- New Articles in Categories I Watch
- Document Revision Updates
By selecting the types of notifications you want to receive, you can be sure that you receive updates that are most important to you.
3. Credits
The credits icon shows your current credit balance on the site that you can use to purchase content. Clicking the Credit icon will take you to the Add Credits page when you need to buy more credits.
4. Cart
The cart icon, unsurprisingly, takes you to your cart and shows any content you’ve added to it. It will also load a cart that you previously saved if you haven’t yet purchased it (click Save Cart on the cart page to save it as an unpaid order).
You can also access your Wishlist from the Cart menu. Just click the My Wishlist option and you’ll see all articles you’ve wishlisted that are still available for purchase.
5. Tools
The tools icon houses most of the pages that you’ll use on the site. You’ll find the following pages under this menu:
- My Projects
- Content Publisher
- My Requests
- My Favorite Writers
- My Sent Offers
- My Orders
- Download My Content
- My Revisions
6. My Account
The My Account menu is now located under the space where your email address is listed (Hi, EHOPPE@ in the image above). Here you’ll find the following pages:
- Dashboard
- Edit My Account
- Chat
- Partner Programs
- Contact
- Log Out
I hope you’ll find the updated menu helpful in managing your content projects. If you have any questions or feedback for us, please get in touch or leave a comment below.


